How to mask HTML elements from co-browsing
When integrating Fusion Live Assist into your application, there may be times when certain parts of a webpage contain sensitive information that should not be visible to the support agent during a co-browsing session. For privacy or legal compliance, you can hide specific HTML elements from the agent using a special CSS class.
An example implementation is available in this Bitbucket repository:
fusion-live-assist-content-masking
How It Works
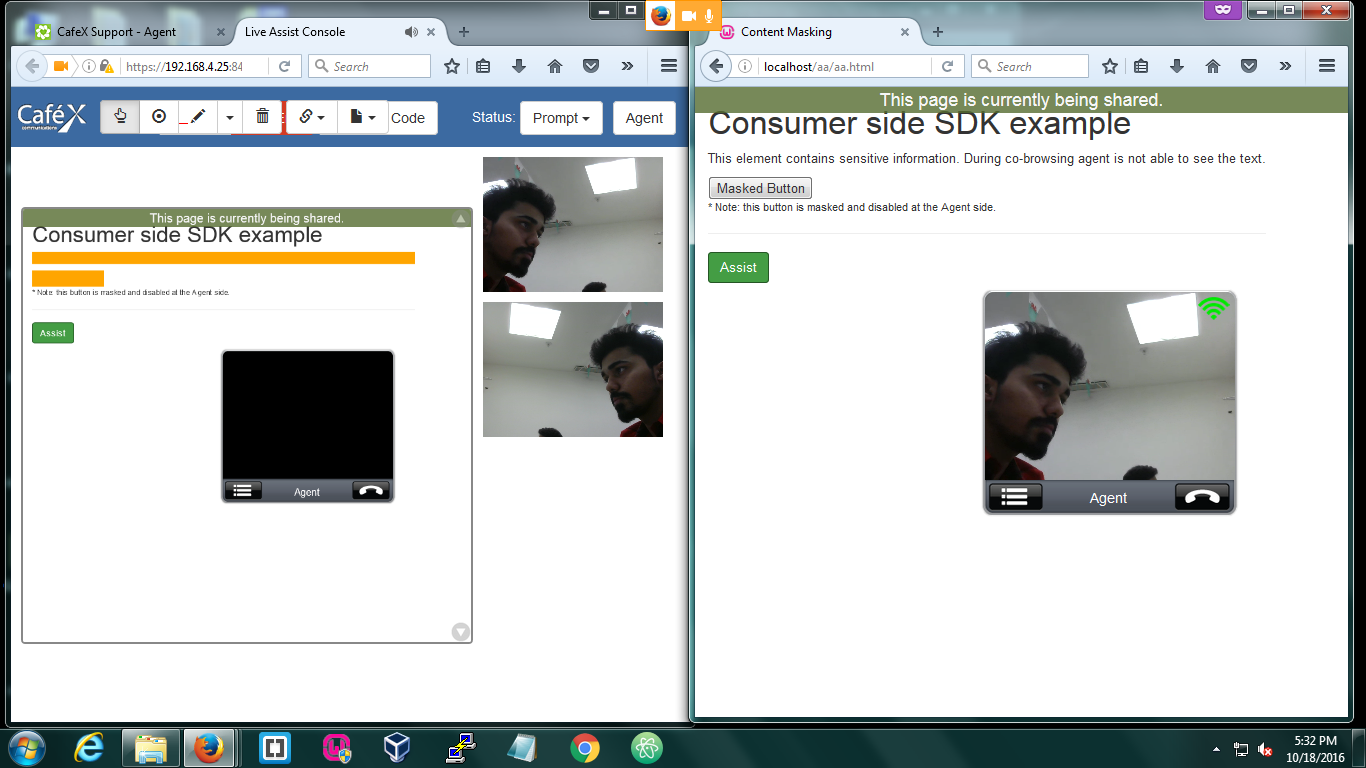
To mask an HTML element, simply add the class assist-no-show to the element you want to hide from the agent’s view.
Example:
Note: On the consumer side, the content remains visible. On the agent's side, it is replaced with a solid-colored box.
Customizing the Mask Color
By default, masked elements appear as black boxes in the agent console. You can change this by defining a custom color using the .assist-no-show-agent-console CSS class:
.assist-no-show-agent-console {
    color: orange;
}
This will render the masked area as an orange box for the agent, while still displaying the original content to the consumer.
Hiding the Box Completely
If you prefer to make the element invisible (while still preserving layout spacing), use:
This will make the element fully transparent on the agent's side but still occupy the same space in the layout.
Reminder: These styles only affect what the agent sees. The consumer experience remains unchanged.